
Parental controls are what a lot of parents are looking for nowadays. Most social media platforms and device manufacturers are adding parental controls in their latest editions. Over one billion people around the world use iPhones and iPads. It makes sense for iOS parental controls to exist since so many children will be using iOS devices. There are also iOS parental control apps made by third-party companies, that have more features available for parents. In this blog post, we’ll talk about why you need iPad and iPhone parental controls, how you can enable them, and the features that they provide. Make sure that you’re iPhone and iPad’s iOS version is the latest.
Download and Start Your Free Trial of the Safes Parental Control App
How to Set Up Parental Controls on iPhones and iPads
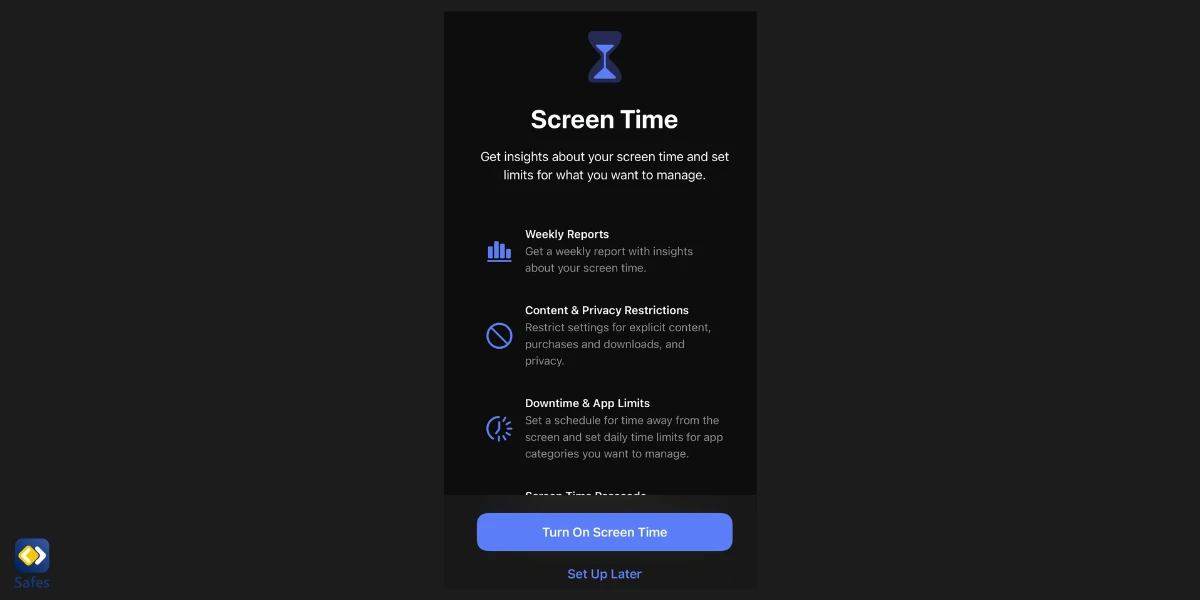
Apple’s parental control features are, confusingly, called Screen Time. Though some of the features have nothing to do with screen time at all. To set parental controls on iPhones and iPads you first have to turn on Screen Time. You can also create family group using a feature called Family Sharing. Screen Time and Family Sharing work simultaneously and you don’t need a family group to use Screen Time.
How to Turn On Screen Time on Your iPhone and iPad
Here are the steps on how to enable iPad and iPhone parental controls.
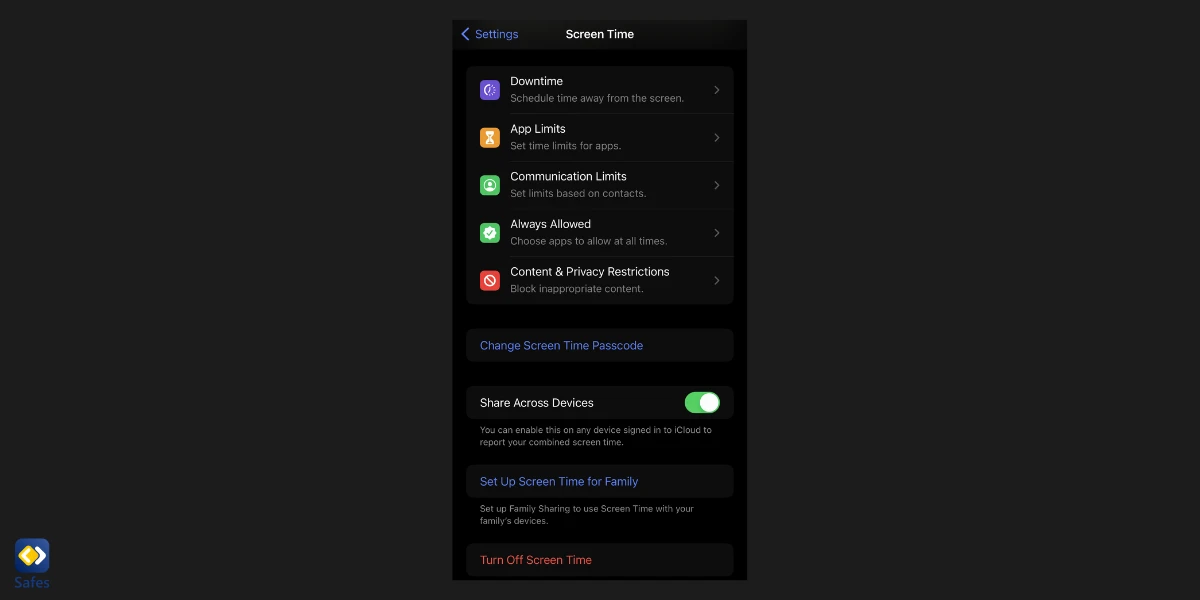
1. Go to Settings > “Screen Time” > Turn on Screen Time
2. Choose between “This is My [Device]” or “This is My Child’s [Device]”
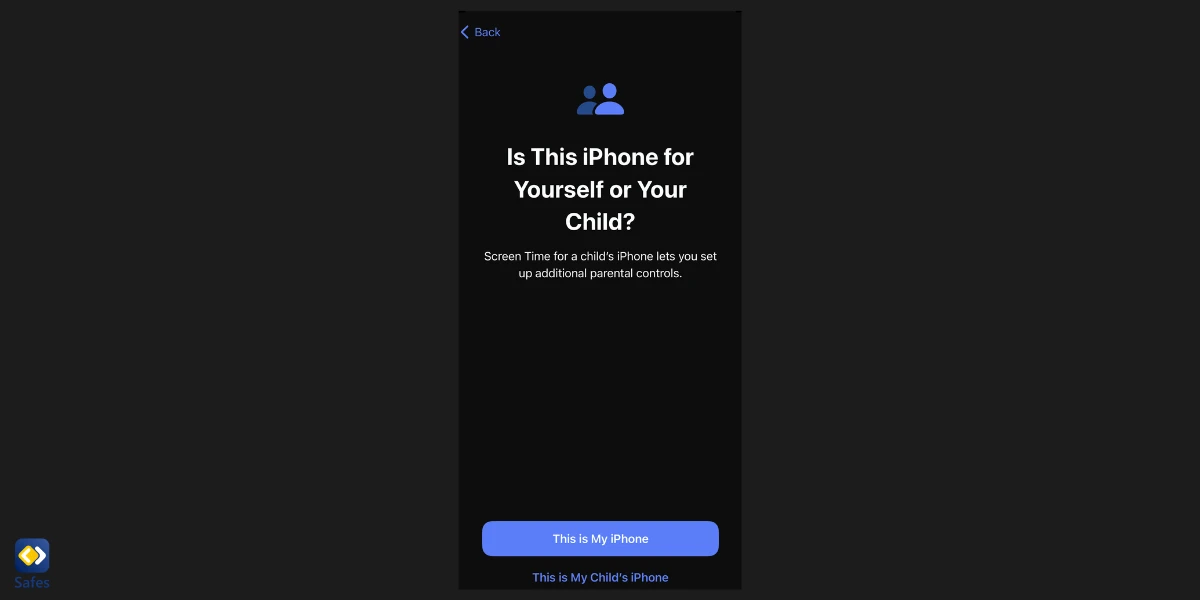
If this is your device, you’ll be shown the Screen Time page. We recommend tapping on “Change Screen Time Passcode”. This way, other family members won’t be able to change your settings without having the passcode. Also, provide an Apple ID so that you can recover your passcode if you ever forget it.
If this is your child’s device, follow the prompts until you’re asked to set a passcode. You’ll also be asked to provide an Apple ID just in case you ever forget your passcode.
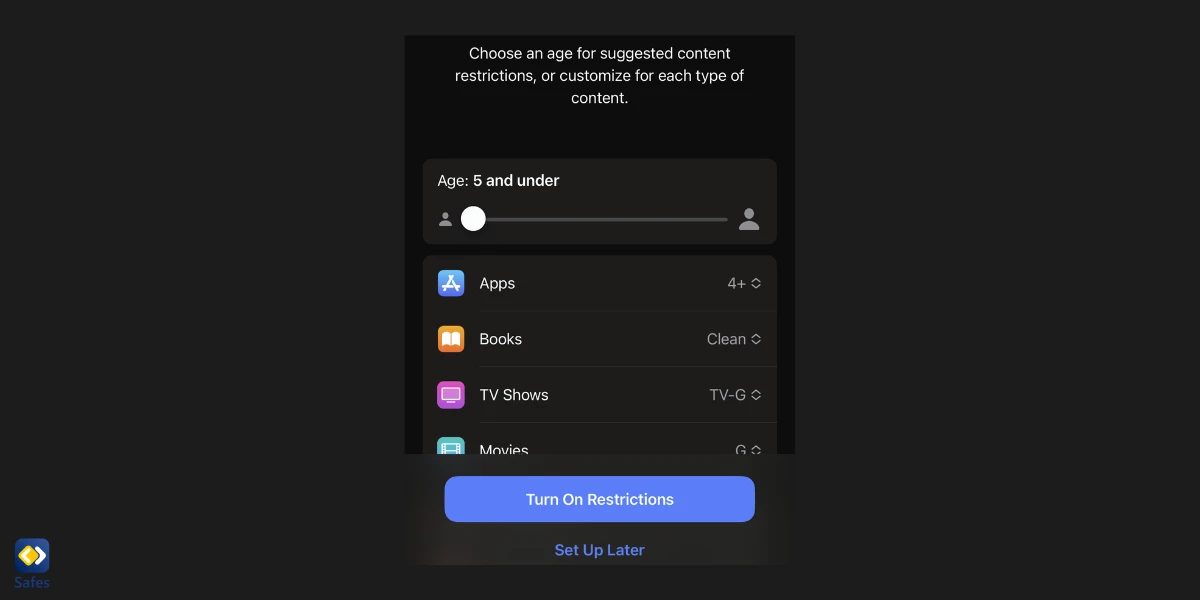
3. Now, you have access to various parental controls on iPad and iPhone. If the device is your child’s, you will be asked to set age-related restrictions for content categories such as books, TV shows, and movies.
Content & Privacy Restrictions
After learning how to set parental controls on the iPhone and iPad, comes the fun part. Here you can set restrictions for your child. If you have a passcode set, after tapping on Content & Privacy Restrictions, you’ll be asked for it. On the Content & Privacy Restrictions page, first turn on the settings.
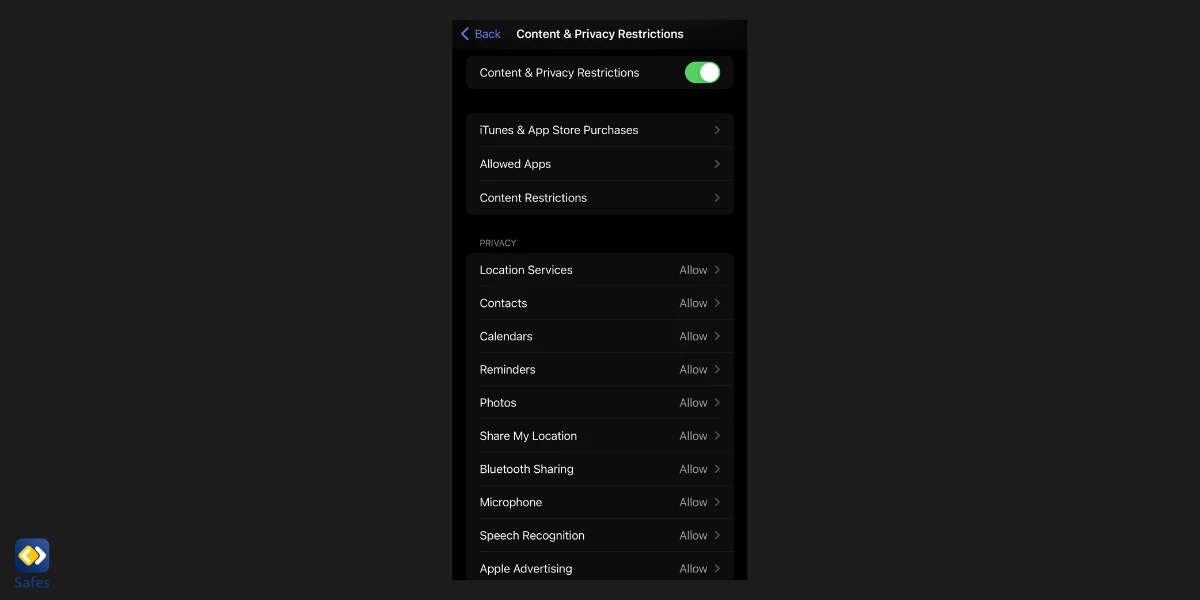
The content & privacy restrictions include these sections:
- iTunes & App Store Purchases
- Allowed Apps
- Content Restrictions
- Privacy
The privacy settings allow to micromanage which apps have access to what information. Below, we will cover the other sections.
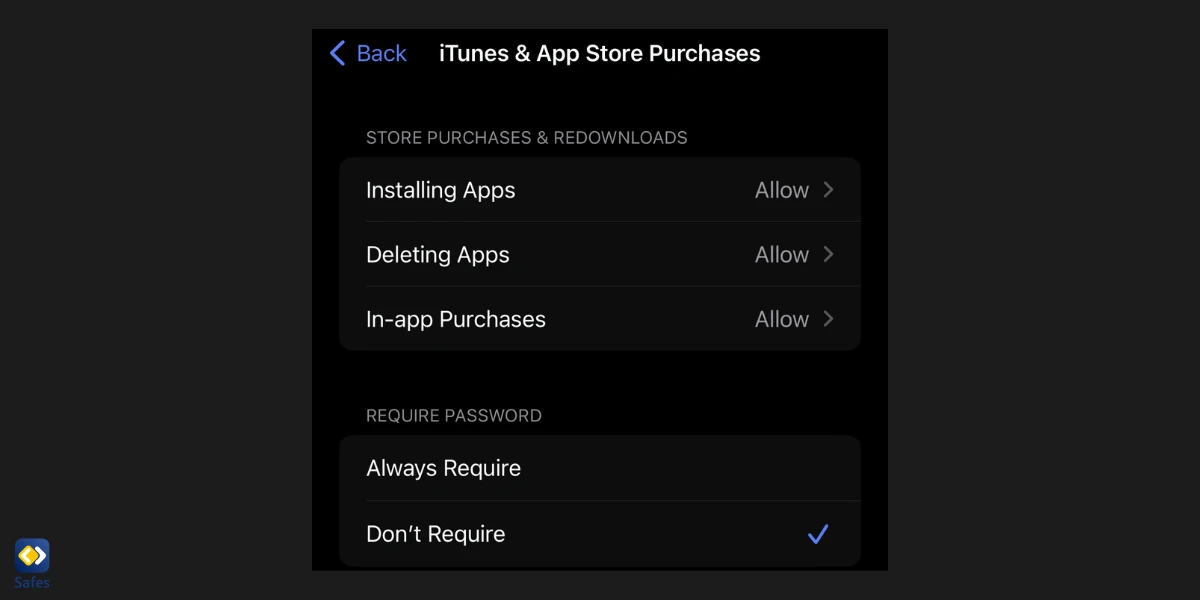
iTunes & App Store Purchases
With Screen Time, you can prevent iTunes & App Store purchases or downloads. Simply follow these steps:
- In Content & Privacy Restrictions
- Go to iTunes & App Store Purchases
- Choose a setting and set it to “Don’t Allow”
- You can also decide whether additional purchases from the iTunes & App Store or Book Store require a password or not.
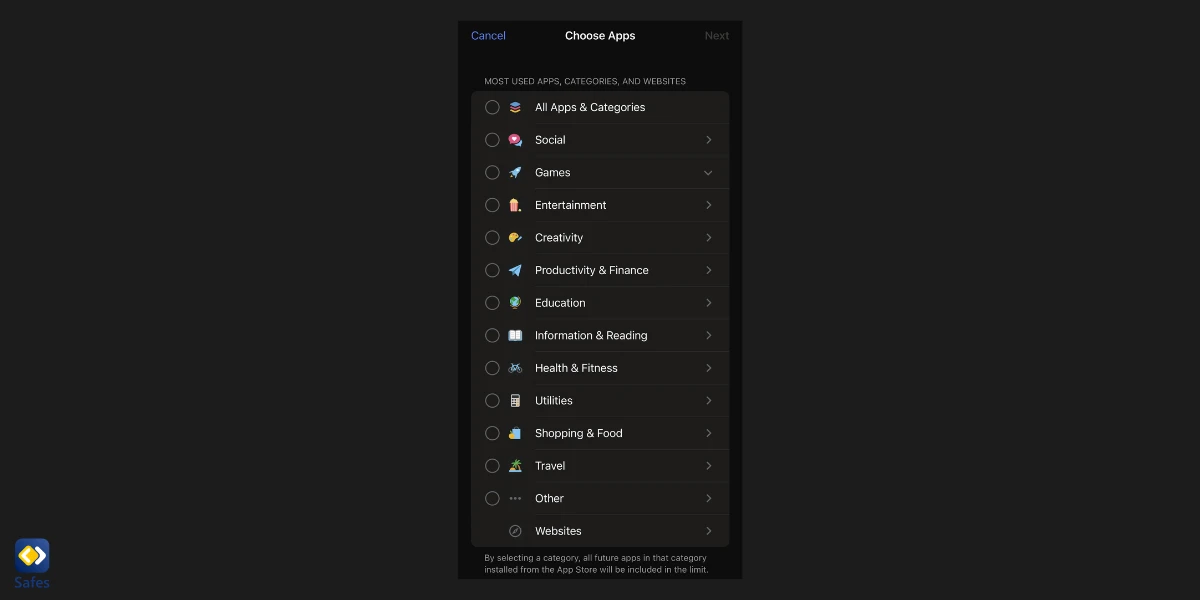
Allowed Apps
In the Allowed Apps section, you can decide to disable any of the built-in apps of iOS. Keep in mind that this does not delete the app. Instead, it just makes it disappear from the Home Screen. You can enable the app through the same settings any time you want.

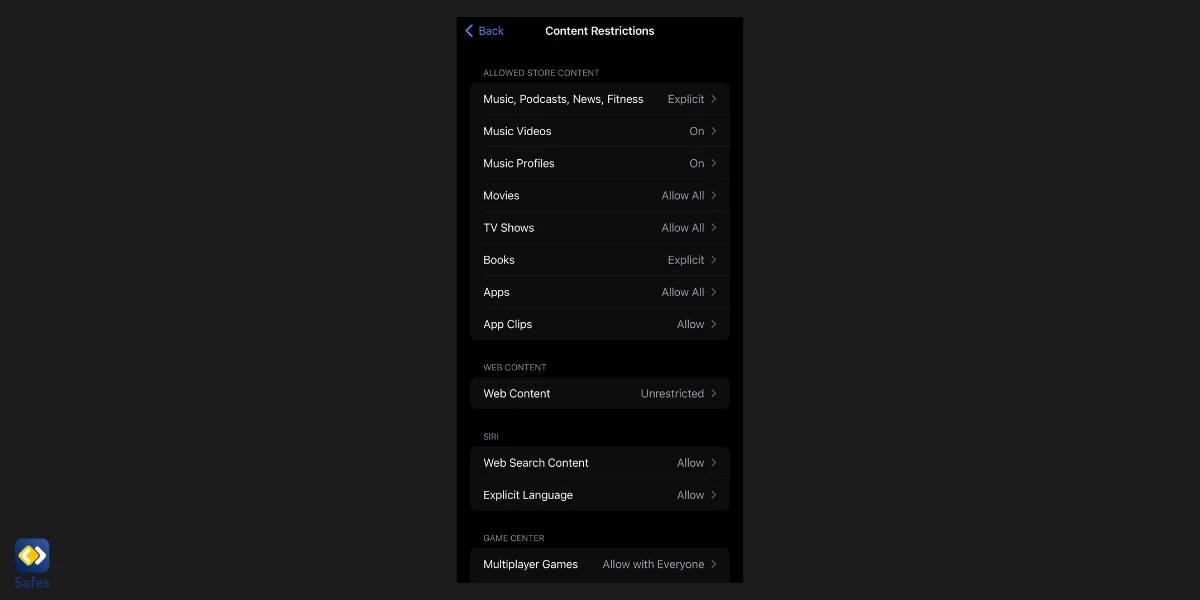
Content Restrictions
The content restriction page enables you to specify the age rating of the content that the device user is exposed to. You can change the age rating of each category individually. For some you’ll only be able to allow explicit content or not. But for other categories, such as TV shows, you can specify the age rating of the content.
Here, you can also limit the web content the device user can access. There are also parental controls setting for Siri and the Game Center that you can use.
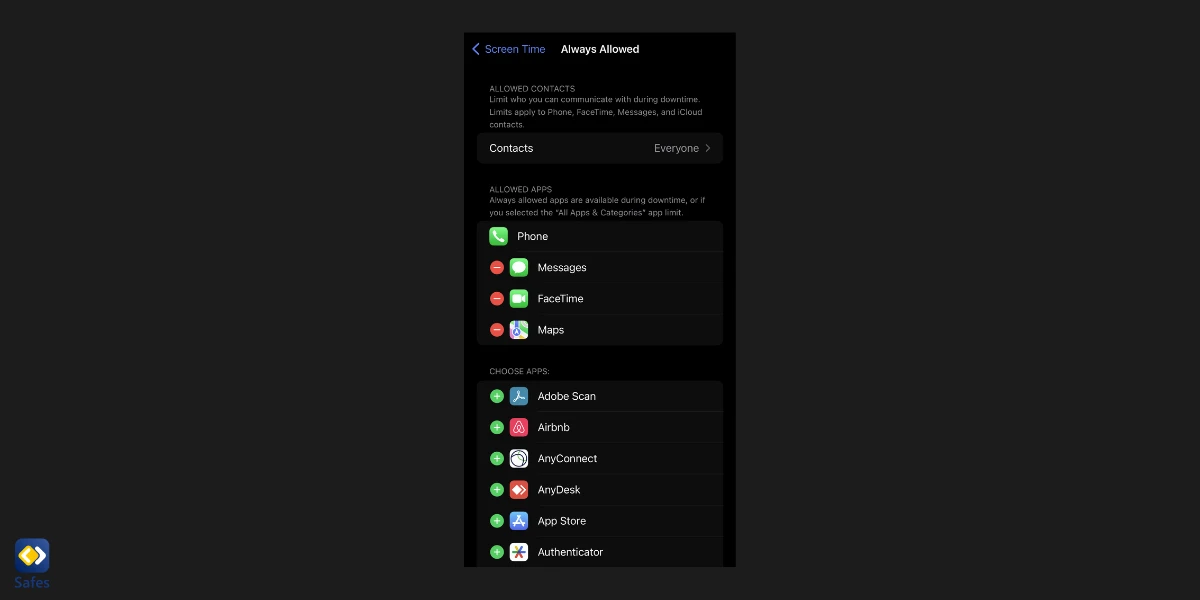
Always Allowed
In this section. You can choose what apps you want to allow at all times. Three apps are chosen by default, but you can add as many as you want. You can also restrict the contacts that can be communicated on FaceTime, Phone, Messages, and iCloud.
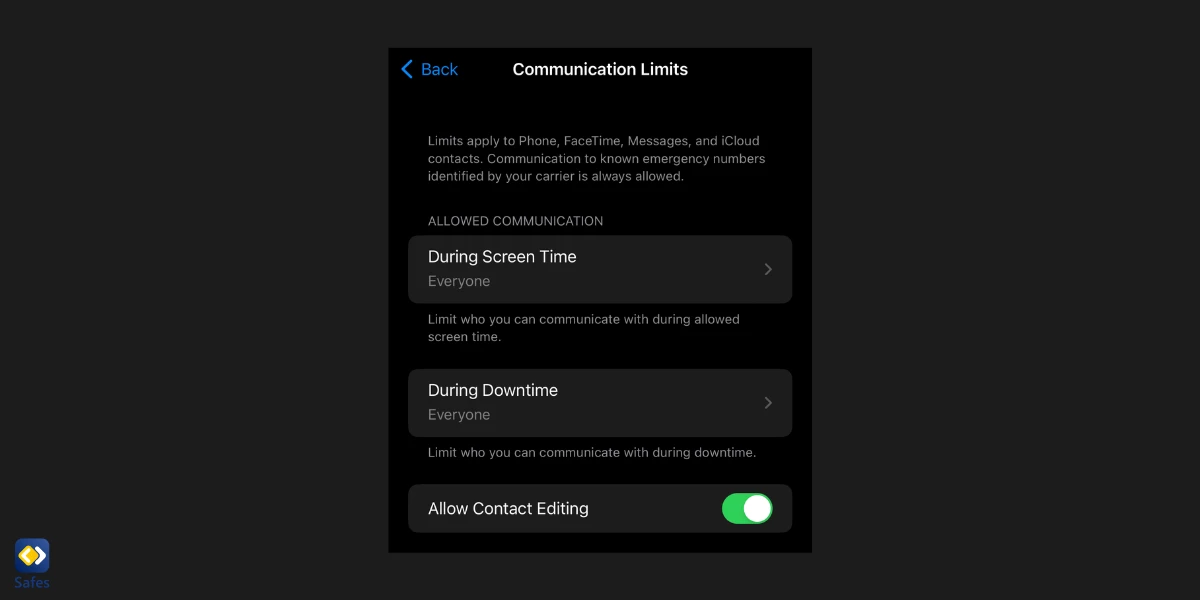
Communication Limits
In this section, you can determine what contacts can be communicated during Screen Time and what contacts can be communicated during Down Time separately. These limits apply to Phone, FaceTime, Messages, and iCloud.
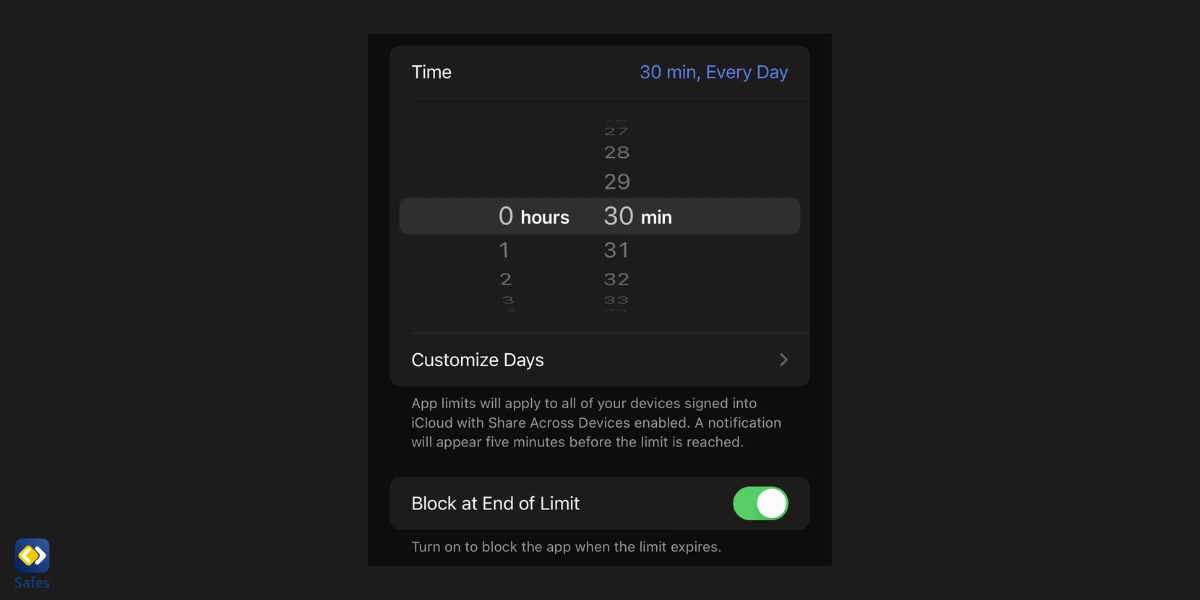
App Limits
In this section, you can set time limits for each app separately. Simply tap “Add Limit” and choose the category of the app you want to limit. After choosing the app, determine the amount of time the app can be used every day. You can also choose entire categories.

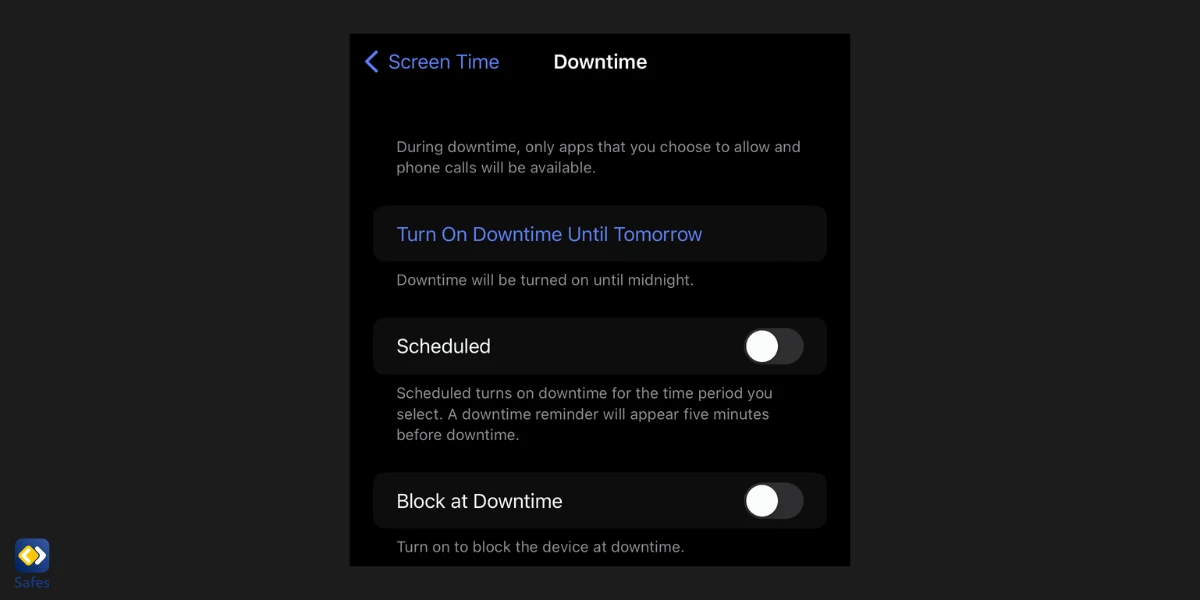
Downtime
Downtime refers to the apps that will be restricted when you’re not using your phone. Basically, when you enable Downtime, all apps are restricted except for the ones you make an exception. You can even schedule Downtime so that it only happens at a specific time of day.
Set Up Screen Time for Family
If you’ve set up Screen Time for your device, at the end of the page, you’ll see an option titled “Set Up Screen Time for Family”. This is one way to set up your child’s Screen Time and Family Sharing at once.
Another way to set up Family Sharing is to follow these steps:
- Go to Settings > “Your Name”
- Tap on “Family Sharing”
- Follow the onscreen instructions
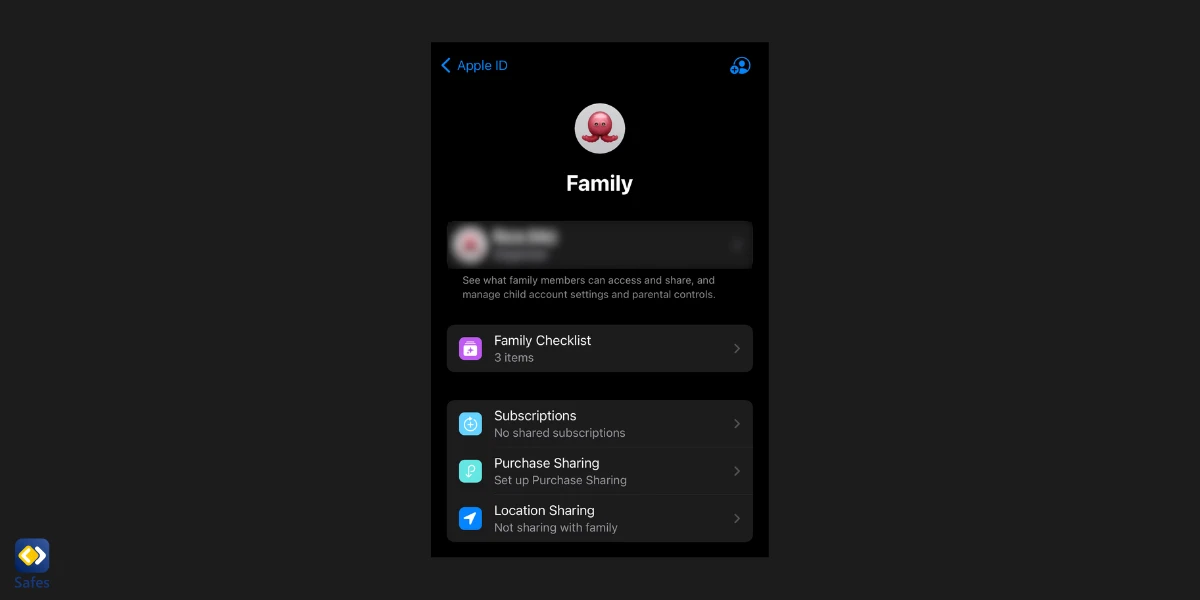
You can add a child by tapping on the icon in the top right corner. After adding a child, follow the on-screen instructions and you’ll be asked if you want to set content restrictions for your child from the start.
Here you can manage your family’s subscriptions, their purchases and account balance, and you can share your location with family members. Also, in the “Family Checklist”, you can add emergency contacts and other important information that should be shared with family members.
Using iPad and iPhone Parental Control Apps
Other than the parental controls that are built into the iPhone and iPad operating systems, you can also use third-party parental control apps. Though there are free parental control apps for iPhones and iPads, the best parental control apps for iOS have the same features that Screen Time does and more.
Safes is a parental control app designed to be used across multiple platforms such as iOS, Android, Windows, and Mac. The Safes app allows you to:
- Set screen time limits for individual apps
- Manage schedules for app usage
- Track your child’s location
- Check your child’s location history
- Block specific URLs
- Filter specific keywords and restrict them from being searched
To set parental controls on iPads and iPhones using a third-party app, download and install the iOS version of the Safes app and Safes Kid app on you and your child’s phone, respectively. If one of you doesn’t have an iOS-operated device, you can download another version instead. In fact, the parent version of Safes is also accessible through the Safes web panel.


